Soil solarization is an effective, non-chemical method for managing soil-borne pests, weeds, and pathogens by harnessing the sun's energy. It involves spreading plastic sheeting over an area you wish to clear and letting the sun's heat do the hard work for you. This technique is particularly well-suited for the hot, sunny weather we are currently experiencing!
What kind of plastic to use: For optimal results, use clear, 2 to 6 mil thick polyethylene plastic sheeting. 6 mil will be thicker and less likely to tear but 2 mil will work just as well. While black plastic might seem the intuitive choice for heat absorption, clear plastic is better because it allows sunlight to penetrate and heat the soil more effectively, creating a "greenhouse effect" underneath. Avoid opaque or colored plastics, as they will block the solar radiation.
How to prep the soil: Proper soil preparation is crucial for successful solarization.
- Clear the area: Remove all plant debris, large rocks, and weeds from the target area. The smoother the soil surface, the better the plastic will contact the soil. You may want to mow or weed eat the area to be solarized prior to laying the plastic.
- Till or cultivate: Loosen the soil to a depth of at least 6-8 inches. This allows for better heat penetration.
- Moisten the soil: Water the soil thoroughly until it is moist but not waterlogged. Moist soil conducts and retains heat much more efficiently than dry soil. Think of it like steaming – the moisture helps transfer the heat throughout the soil profile.
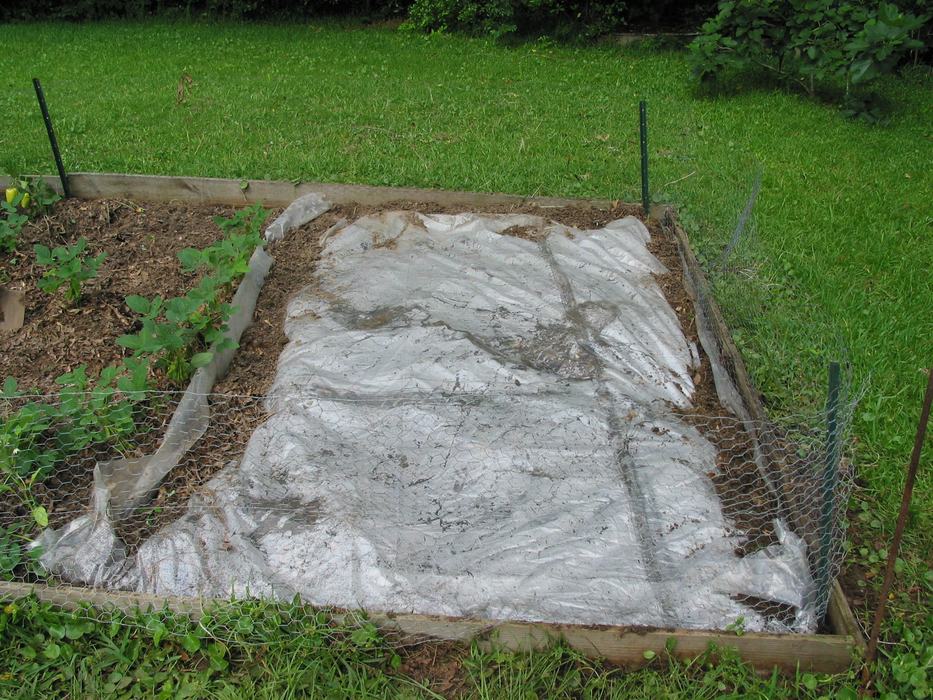
How to anchor the sheeting: Once the soil is prepped and moist, carefully lay the clear plastic sheeting over the prepared area. Ensure the plastic is pulled taut and makes good contact with the soil surface.
To anchor it securely:
- Bury the edges: Dig a trench around the perimeter of the area and bury the edges of the plastic in the trench, backfilling with soil. This creates a seal that traps the heat and prevents wind from dislodging the plastic.
- Use weights: For larger areas or added security, you can place heavy objects like rocks, bricks, or bags of soil on top of the plastic, especially along the edges and in the middle, to maintain good soil contact.
How long to leave it: For best results, leave the plastic in place for
4 to 6 weeks during the hottest part of the summer (typically July and August). The longer the plastic remains, the deeper and more effectively the heat will penetrate, and the more pests and weeds will be controlled. In cooler periods or for very persistent issues, a longer duration might be beneficial.
The temperature the soil will reach underneath: Under ideal conditions (clear, sunny days and good soil moisture), the soil temperature underneath the plastic can reach 120-140°F (49-60°C) in the top 2-6 inches. Deeper soil layers will also heat up, though to a lesser extent. These temperatures are lethal to many soil-borne organisms.
How it kills weed seeds and pathogens: The high temperatures generated during solarization have several detrimental effects on weed seeds and pathogens:
- Protein denaturation: The intense heat denatures proteins and enzymes essential for the survival and reproduction of weed seeds, fungi, bacteria, and nematodes.
- Cellular disruption: High temperatures disrupt cell membranes and other cellular structures, leading to the death of weeds.
- Moisture and heat synergy: The combination of high temperatures and high humidity (due to the trapped moisture) creates a "steam pasteurization" effect that is highly effective at killing many common soil pests and diseases, including Verticillium wilt, Fusarium wilt, damping-off fungi, and various weed seeds.
Important to note! Once you remove the plastic and are ready to plant, do not till the soil. Only to top few inches have been heated enough to kill weed seeds and tilling could bring new seeds to the surface to germinate in your newly cleared plot.
By following these steps, North Carolina gardeners can effectively utilize soil solarization to create a healthier growing environment for their gardens, reducing reliance on chemical controls and promoting sustainable agricultural practices.